Concrete Cost in Hawaii

The island state of Hawaii is a prime spot for real estate property. A true paradise on earth with beaches, sunshine, and incredible natural landscapes. Buying a property here is expensive, but it is a great place to own a property if you have the money. Perhaps you already own a property, or you are planning to own one, one of the things you need to know is the cost of concrete for various projects within Hawaii. You may ask, why concrete? The answer is simple – concrete is the most used building material, and whether you like it or not, you will need concrete. Better to know the cost beforehand.

FACTORS DETERMINING THE COST OF CONCRETE

Type Of Concrete Used: Concrete comes in different types and quality. All these would determine how much you have to pay. For instance, the price of ordinary concrete cannot be the same as that of high-performance concrete or ultra-performance concrete.

Location: Your location also matters when you are ordering for concrete. Although the prices are similar, it is not the same across all the major cities. So you should not expect to get the same concrete price for Oahu and Honolulu. Another area where location matters are in the delivery of concrete. Concrete suppliers usually charge for delivery based on miles, so you have to ensure that the supplier is close to your construction site for you to get the best price. It also ensures that your concrete is in the best shape when delivered, so it is a win-win.

CONCRETE COST BY TYPE OF PROJECT

The type of construction you are executing is what ultimately determines the cost of concrete. Each construction project has different standards in terms of quality of concrete that would be used for it, and this, among other factors, will determine how much you will spend on concrete. Here, we look at the different concrete projects and the price.

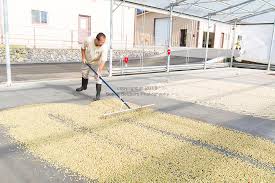
Concrete Foundation: Building a concrete footer is an important project that could determine the entire project’s success and failure. The average cost of installing a concrete foundation is $10.65 per square foot if a 4-inch reinforced concrete slab is used. The price could range between $9.58 and $10.65, depending on many other factors.

Concrete Patio: Adding a patio to your home could be the perfect home improvement you need. The cost of concrete installation is between $9.78 to $10.92, while the average cost is $10.35.

Concrete Stamping and Coloring: Concrete has a usually dull grey color that many people don’t find pleasant, which is why decorative concrete has become a norm. With many types of decorations available, the sky’s the limit to how you can transform your concrete. The cost of decorative concrete in Hawaii is expensive, with the average for a simple stamping design costing as much $17.89. The cost may range between $17.07 and $18.71.

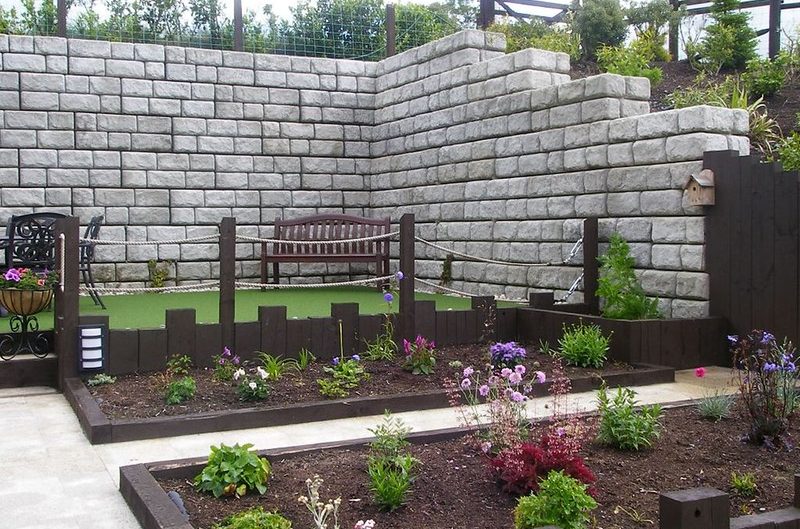
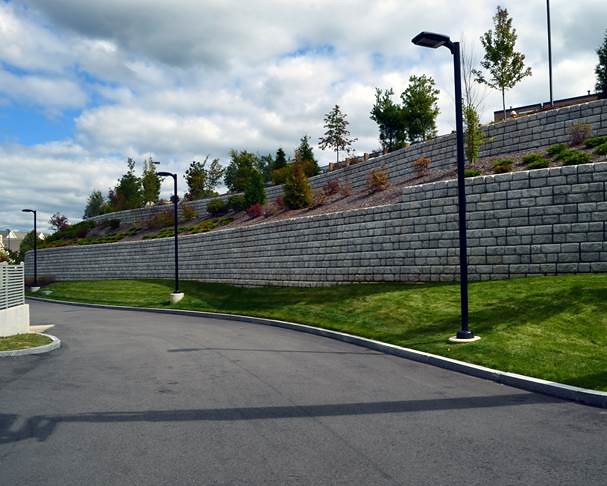
Concrete Block Wall: Thinking of installing concrete walls for your building in Hawaii, then be prepared to spend between $12.59 to $15.68 per square foot. On average, you will spend $14.14.

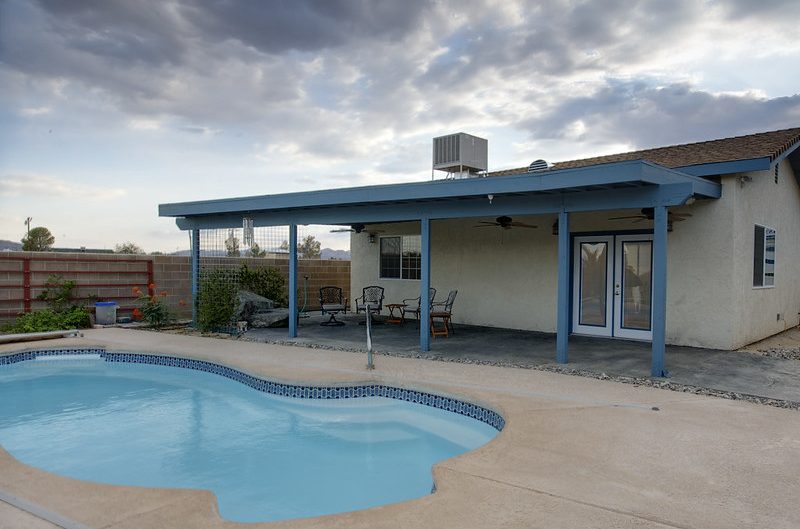
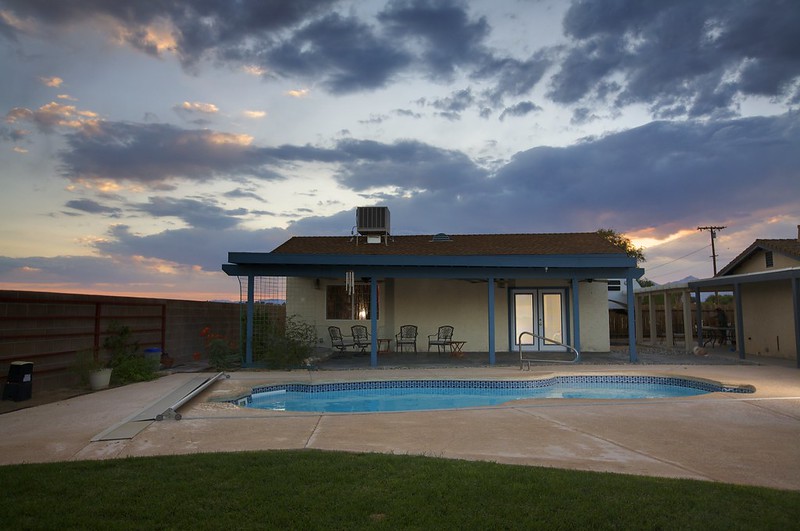
Concrete Pool Deck: A swimming pool is a significant investment, and adding a deck is just the right way to finish off the pool. It costs an average of $8.39 per square foot to install a pool deck. With a range of between $7.37 to $9.41 for a 4-inch reinforced concrete slab, the price includes the cost of labor and rebar used for the reinforced concrete but excludes any special finishing.

Walkway or Sidewalk: A concrete sidewalk installation costs between $9.78 and $10.92 per square foot. On average, it costs $10.35.

Concrete Pool vs. Other Types of Pools

Do you want to build a swimming pool, and you’re thinking of which material to use? There are two types of swimming pools you can build—an above-ground or in-ground pool. An above-ground swimming pool is not advisable as it has many disadvantages. So if you decide to build a pool, an in-ground pool is the best option. The bigger problem is choosing which material to use for the pool. Three materials are available –  concrete, fiberglass, and vinyl. Deciding which one to use can be tricky, so we wrote this article to examine their pros and cons.

Concrete

Advantages

Flexible Design: concrete is a malleable material that can be used to build pools in any shape, size, and depth.  This means you can customize it in any way you like, giving your house further aesthetic benefits.

Durable: Concrete is durable and lasts long if properly maintained.

Disadvantage

Maintenance: concrete pools are difficult to maintain. Keeping it clean is hard work. It requires brushing and chemicals to maintain its good state and needs to resurface every 10-15 years. Thus, a lot of money might go into maintenance

Roughness: the rough texture of the concrete pool makes it a suitable habitat for algae and sometimes difficult for children as the hardness can hurt their feet. 

Longer construction period: building a concrete pool requires more time than other kinds of pool

Not suitable for salt chlorination: When salt chlorination is used, the pool has to be resurfaced sooner and requires more maintenance.

Fiberglass

Advantages

Maintenance: it is the easiest pool to maintain. Its smooth surface means algae can’t grow in it. It is also resistant to corrosion, making it suitable for salt chlorination.

Building time: unlike concrete, installing a fiberglass pool takes a short time because it is prefabricated offsite. All you have to do is fix it into the hole. Installation takes less than five days.

Smooth texture: the smooth surface of the pool makes it appropriate for adults and children.

Range of designs:  It is also available in various colors and designs which you’ll be familiar with from the onset.

Durability: it does not require resurfacing like the concrete pool. And when damaged, it can be easily repaired. It can adapt to weather conditions as well as soil contraction and expansion.

Natural insulation: the fiberglass is an excellent insulator that will keep the pool water warm and save energy. 

Disadvantage

Size: since the pool is prefabricated, it has to be transported from the manufacturer to the installation site. This has a limited size, unlike that of the concrete pool.

Not Flexible: concrete offers a broader range of designs, shapes, and structures. The mold design for fiberglass pools is limited.

Vinyl

Advantages

Cheap: the initial cost of building a vinyl pool is the cheapest of the three, making it affordable even if you’re working with a strict budget.

Customizable shape: they usually come in rectangular shape but can be customized for extra money

Disadvantages

Expensive to maintain: the cost of maintenance is high as you need to reline the surface every few years.

Durability: it is not compatible with salt chlorination as it has aluminum on its perimeter and metal wall panels. These will corrode with salt.

If you need any more advice find your local pool builder and ask them any questions you might have.

How To Build A Concrete Retaining Wall and Its Benefit For Your Home

A concrete retaining wall is the best option to use if you want to remove an unleveled slope, add a planting bed, or to control erosion. 

Concrete retaining walls are not difficult to build, and anyone can install it. Also, the concrete retaining walls are long-lasting, and it can be built with different textures and colors. 

We have compiled ways to build concrete retaining walls and its benefits for your home. 

Materials and tools used

  • Sand 
  • Compactable gravel 
  • Crushed gravel
  • Concrete adhesive 
  • Block chisel 
  • Shovel 
  • Wheelbarrow 
  • Tamper
  • Transit 
  • Caulk gun 
  • Trowel 
  • 3-lb hammer 
  • Concrete blocks 
  • Brick tongs 
  • Tape measure 
  • 4 ft level 

Steps to build concrete retaining walls

  1. Mark out the area 

The first step is to mark out the area where you want to build the concrete retaining walls. Also, find out if they are any underground wire.

In some cases, cable wires or telephone wires are buried underneath the surface level of the ground. 

  1. Dig and level the base 

Proceed to dig and level the surface where the concrete retaining wall will be built. To do this, use transit to make a smooth and level height. 

Then go on to build a deep flat space of 4-6 feet and a width of about 24-28 feet. It let you build the allowed base material. 

Give a clear space of a minimum of 12 feet at the back of the wall to build the crushed rock. 

  1. Install 

Put in about 4-6 feet of sand or material level to the upper part of the stakes. Also, reduce it until you are sure it is 1 foot underneath the top. You can use a tamper for this. 

  1. Pour sand into space and screed it 

Give a smooth sand base for building the initial part of the blocks. Use a flat screed board to make the sand level. 

Also, use a hand trowel to remove bumps if they are any. 

  1. Make the initial row level 

Use a tau sting line to make a level row after installing the first part of the blocks. Then add natural soil to straighten the level on both sides. 

  1. Hit pins to close the parts one after the other 

This will enable you to achieve the ¾ backset for every row. An additional pin is needed to put the installed pins under the block surface so it won’t disturb the blocks on the subsequent rows. Then cut the blocks with a chisel.

  1. Backfill with crumpled and unbalanced gravel 

Crushed gravel helps in providing a channel for water to pass through. It would also help in leading the backfill pressure downward and not outward. 

  1. Use unique cap blocks 

Cap blocks can be placed with a slender overhang. The cap blocks end the concrete retaining walls. It also makes the top of the walls lovely. 

Benefits of a concrete retaining wall 

  1. It helps in preventing floods by directing the rainwater to the road
  2. It also helps in beautifying your home
  3. It prevents the soil from causing havoc in your home
  4. It is durable and reliable

Conclusion 

With the right tools and materials, you can build concrete retaining walls with ease. There are more than enough good reasons why concrete retaining walls should be considered in your home. 

Concrete Skate Parks

In recent times skateboarding has started to gain back its prominence. However, it has consistently outperformed conventional team sports such as football and baseball in terms of the growth of participants and equipment sales.

A skate park serves as a recreational and an energetic environment engineered and constructed to be used for the sole purpose of skating.

Concrete Skatepark is used by skateboarders, inline rollerblade skaters, BMX riders, and scooter riders. Such a facility’s objective is to offer a safe environment for users to converge, relax, practice, and perform extreme sports. 

Several elements and obstacles that a concrete skatepark consist of are designed for riders to test their abilities as they cruise.

Let’s take you through a few interesting facts about a concrete skate park.

Concrete Skate Park Construction

The construction, design, and implementation of a modern skatepark require the expertise, attention to detail, and a thorough understanding of the skateboarding sport.

Moreso, the designer ought to have prior experience in organizing and planning, plus a long term experience in the skating sport.

However, the builders for this project must be monitored appropriately for an accurate technical implementation and work quality of each of the construction phases.

Another essential element to the successful completion of this project is site supervision.

To put the construction of a concrete skatepark in perspective, outlined below are the phases of construction:

  1. Site
  • Choosing a suitable site
  • Site Evaluation
  • Site Preparation
  1. Specification
  • Concrete type
  • Cold weather concrete
  1. Reinforced Concrete
  • Concrete carbonation
  • Chloride attacks
  1. Reinforcement
  2. Drainage
  • Above Grade Drainage
  • Below grade drainage
  1. Expansion joints
  2. Concrete Construction
  •  Form Work
  • Filling
  • Screeding
  • Floating
  • Finishing

Interestingly, skatepark materials continue to improve over time. In modern designs, material such as brick, boulders, concrete, granite, glass, ceramic, and marble are also used.

The completion of a skatepark typically stalls around 6 months to 4 years; however, this depends on the complexity of the architectural framework.

How Much Does A Skate Park Cost?

Placing a price tag on the construction of a concrete skate park is not entirely feasible, it’s more like asking, ‘how much does a car cost?’

Nevertheless, there are two cost associated with the construction of Skatepark, they are:

  • Design and facility construction cost
  • Maintenance and operating cost of the facility 

These costs are referred to as TCO (total cost of ownership)

For instance, the average cost to design and build a skatepark is $45 PSF (per square foot). So a 5000 square foot spot will cost $225, 000, and this can only accommodate a handful of skaters at a time. So we will try to go for a reasonable starting point of a 10,000 square foot skatepark. This will cost $450,000.

Factors

Interestingly, several factors could affect the cost of construction, although, in its entirety, it’s quite impossible to enumerate the impact of these factors particularly;

  • Adjacent Construction
  • Amenities
  • Design Constraints
  • Details of the design
  • Distance to construction materials and resources
  • Drainage
  • Donations from community members
  • Preparation of the site
  • Size of the spot
  • Specialized labor
  • Condition of the soil
  • Number of volunteered labor

Finally, although concrete stark parks may seem more expensive to construct, they are durable and take less time to construct.

The Future of Concrete

With the increasing number of population, the usage of concrete is also increasing rapidly. Concrete is considered one of the most used materials in the world. Along with its benefits, it emits a large number of CO2. Today, the use of concrete is inevitable as it is the prime need for the design and manufacturing industry. Therefore, scientists are researching and experimenting with new ways to reduce its effects on the environment. Architectures, engineers, designers, and researchers are working to improve their productivity. In this way, future concrete will be safe for the coming generations.

  1. Environmental Action: 

Researchers are trying to avoid the adverse effects of concrete on the environment. The latest techniques and methods are adopted to produce eco-friendly concrete. As cement is one of the most harmful materials that emit almost 5% to 7% of CO2 harming the natural world. France’s Vendee department has taken the initiative to produce green cement. Hoffmann Green Cement Technologies now runs the first green plant in their country. They have found a substitute to clinker and limestone decarbonization. Following FastCarb national plan, they are doing a reversal of decarbonization into carbonation of recycled concrete aggregate. In this way, they can recycle the waste material and can minimize the emission of CO2 to a great extent.

  1. Rock-Solid Innovation:

Along with environmental impacts, scientists have introduced other innovative ways to use concrete effectively. In cement labs, new processes are emerging to enhance concrete quality. A Dutch company, Basilisk, has introduced self-healing concrete. They have used the technology that produces limestone and automatically heals the cracks in concrete structures. Besides, a Norwegian company named Disruptive Technologies observes and tracks data related to the temperature and performance of the concrete. On the other hand, Datawati uses; data and artificial intelligence that speeds up the material quality. It also maximizes production processes.

  1. New application on Horizon:

In the coming days, concrete is establishing a new identity. Nowadays, people are using it in many ways. Le Pave Parisian developed concrete-speakers that are not commonly found in the market. EtNISI has innovated a technique where waste material of recycled products is utilized for flooring and tiling. MuCEM is using high-performance fiber- reinforced concrete which is creating new creative paths for architects and engineers. Currently, concrete is used in 3D printing for new and better constructional techniques. 

  1. Glass Fiber Reinforced Concrete:

GFRC (Glass Fiber Reinforced Concrete) is the mortar mixture of concrete, sand, alkali-resistant glass fiber, and water. This concrete is flexible like plastic, which is thinner and lighter than the regular concrete. This material has been used in the Heyd Aliyev Center and complex constructional forms like Gaudi’s church of Sagrada Familia.

  1. Bio-Based Material Concrete:

Another innovative technique introduced nowadays is bio-based concrete. The researchers of Lanchester University UK have found that the mixture of nanoplatelets extracted from roots vegetables such as carrots that can enhance the power of concrete mix. It can also help to absorb C02 released from concrete.

Therefore, it is clear that the future of the concrete is going to bring innovations to the construction industry. Future concrete is going to be eco-friendly, firm, and flexible, yet, it is going to bring new challenges for researchers, architectures, and engineers.

Different Decorative Concrete Colors

  If you have decided to install decorative concrete at your home or premises, choosing the right color can sometimes be overwhelming as there are varieties of colors available in the market. You have to finalize the color before you finish your concrete project. There are different varieties of decorative colors for concrete accessible in the market.

           Naturally, concrete has a light grey color. Nowadays, you can easily change the color of your concrete into different shades. You can match the color of concrete according to your surroundings. 

           Here, we are going to discuss the most common concrete colors:

  1. Tan:

Concrete coloring provides an attractive look to your concrete. If you don’t like grey, Tan is going to be a decent color for you. With the light brown shade mixed with a white or yellow hue, this color is going to suit your outdoors. Tan suits the ground. It has a variety of names in the manufacturing industry; golden wheat, beige, adobe, sand, and buff. You can further beautify it by stains, internal pigments, and color hardeners.

  1. Brown:

Brown colored concrete would be the best for chocolate and leather lovers. Brown decorative concrete is a bit intense than the Tan concrete. It will provide a luxurious look to your outer space. Most homeowners prefer this color as it hides dirt, soiled, or muddy surface. The common names of this color in manufacturing industries are cola, amber, walnut, cocoa, and mocha. You can best achieve its results with stains and color hardeners. 

  1. Grey: 

If you like living a traditional lifestyle of 50s and 60s, the grey concrete would be the perfect choice for your outer space. It gives you a fresh and plain feel. As the concrete already comes in the grey color, therefore you don’t need any extra shading. You can enhance the look of your grey concrete by adding other colors. You can add a white color to get a brighter and crispy look.

  1. Amber:

Amber-colored concrete is a mixture of pale-ale and orange color. It gives a warm and welcoming look to your home. If you are having Spanish-styled exterior or clay roofed tiles, Amber-shaded concrete would be the perfect match. The manufacturers of Amber colors call it terra cotta, burnt orange, bronze, and gold. You can apply it with stains, color hardeners, and integral pigments.

  1. Red:

The last color in our list is the love color Red, but it is not as intense as rose or heart. Red decorative concrete would be an attractive choice for your home decor. Red concrete is widely popular in the Southwest. Those who want to imitate brick paving; it is going to be the perfect choice for them. Its manufacturers also name it brick, rose, and chestnuts. It looks great when applied with stains and color hardeners. To get a deeper color, we suggest you for tropical coloring. However, internal pigments are also enough.

The list we have provided does not cover all the decorative concrete colors, yet you can make new colors by mixing them with different shades. There are a lot of other options available for you.

Most Common Equipment Needed for Concrete

  • Mixer

You want to make sure that the concrete is properly blended for optimum strength and toughness, whether you are mixing in a tank, a portable mixer, or a wheelbarrow.

  • Wheelbarrows

Ideal for bringing (or even mixing) small quantities of concrete or materials on the site of operation.

  • Rubber Boots or Work Boots

Concrete is a hard material and the only way to get through it is to wear waterproof boots to avoid contact with your hands. Rinsing your boots after the concrete is down, too, is simple.

  • Gloves

Most concrete mixes contain additional caustic admixtures which can cause severe burns from prolonged bare skin contact. Gloves avoid over-exposure (and save some rare blisters too) to these components.

  • Safety Glasses

Standard on most work sites, wearing protective glasses is an essential measure of protection while drilling, grinding, trowelling strength, or sawing concrete.

  • Compactors

If a sub-base of some sort is to be prepared for the concrete slab site, a compactor may help to settle the stone or the aggregate into place.

  • Levels

The surface of both the subsoil and the slab must be level. A standard long-line level, or laser level, will allow you to check that before and after pouring, the slab is full according to spec.

  • Tape Measures

Concrete shapes and slab depth require a test of the same “measure twice, pour once” as any other material on the job site. We are also effective in positioning checking and mapping.

  • Moisture Retarders

Moisture or vapor retardants are used to avoid the accumulation of water vapor on a sheet of finished concrete. Commonly, they are put directly below on-grade slabs or below grade.

  • Saws
    Reciprocating saws, circular saws or grinders may be required on the job site for cutting rebars or shapes. They might also be required if under the slab a problem occurs, and a portion of the concrete needs to be removed after it has been set and dried.
  • Shovels
    Shovels help to disperse concrete across the construction site to fill the holes left over during the pouring process or for specific systems. Generally speaking, square-ended shovels perform well for concrete; rounded ones distribute concrete unequally.
  • Rakes and Come-Along Rakes
    The fastest way to begin to spread the freshly-poured concrete more evenly is to use a rake. Garden rakes operate because concrete rakes, also known as come-along rakes, have a more scooped blade for pre-leveling new concrete more quickly. Concrete rakes often have time on the back of the blade to help raise the rebar or mesh into place until it begins to harden.
  • Grinders
    Grinding may also be used for decorative effects such as a distressed finish or is often required if a slab surface has been over-trowelled and the interior of the slab is filled with excess water.
  • Dust Collection Systems
    A dust collection system helps clear the area of operation and protect the safety of the on-site workers while grinding, polishing, drilling, or sawing concrete.